Tips & tricks · AI · Everywhere · ~2 days a week · 19 min read · in-depth guide, doing it ~2 h
A PhD student with AI: research, teaching, and grading
Last reviewed:
In this article
- A typical scenario
- Phase 1: the Monday research routine
- Phase 2: processing papers — a library that answers
- Phase 3: prepping teaching from your own material
- Phase 4: grading tests — AI proposes, you sign off
- Phase 5: emails and admin
- Phase 6: a dissertation is a bachelor's thesis, scaled up
- Phase 7: rules, disclosure, and limits
- Common mistakes
- The best tools
- What you get out of it
- Pro tip
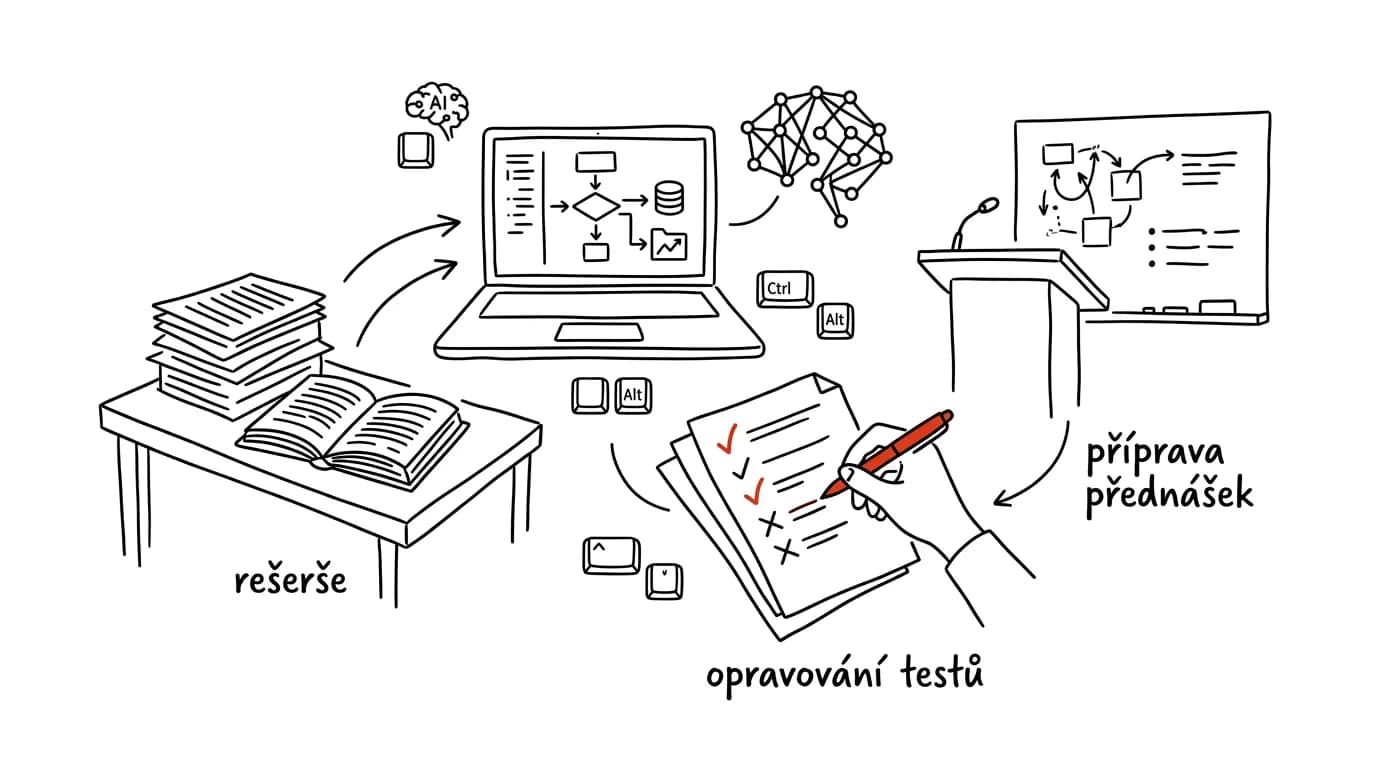
A PhD is a strange occupation: half researcher, half teacher, half administrator — and yes, that's three halves. Most of that work is mechanics that AI can now handle a large part of for you: working through the literature, processing papers, prepping exercises, grading tests, answering the twentieth identical question from a student. What it can't handle is the part that matters: your own research idea, the responsibility for a grade — and the relationship with your students.
This guide walks through a PhD student's week, broken into what you deal with on which day. Seven phases, each with prompts to copy and a note on what to check in what comes back. You don't have to roll all of it out at once — start with whichever phase is eating the most of your time right now, and add another one next month. The research routine and grading usually pay back the fastest.
Two rules sit above the whole text. Grades, evaluations, and messages you send are always your decision — AI is allowed to be a fast first reader, never the last word. And student data is personal data: names, results, scanned tests. It only belongs on an institutional or paid account with contractual data protection, after anonymization, and in line with your university's rules. Before you start, find out what your faculty says about using AI in teaching and research — the rules are being written right now and change every year.
A typical scenario
Marek is in his second year of a PhD. He teaches two sections of twenty-five students each, supervises three term papers, and on top of that has his own research and an advisor who expects progress every month. His week has a fixed shape: Monday, reviewing new papers in the field; Tuesday, prepping teaching materials; Wednesday, sections; Thursday, grading and emails to students; Friday — in theory — his own dissertation. In practice, what's left for it is Friday evening, and only if nobody writes in saying they can't submit an assignment.
The worst part isn't the volume, it's the fragmentation — and the fatigue: grading fifty tests late into the night means the last ten get graded differently from the first ten.
After putting an AI workflow in place, the week looks different. On Monday morning, a finished review from a scheduled task is waiting for him: what came out in the field, what's relevant to his topic, with links and citations to check. He still reads everything himself, but he no longer hunts for it. Section materials come together from his own slides and two papers in an hour instead of an afternoon, solutions and typical student mistakes included. He scans the tests, and the model proposes a score for each answer against his key, with reasoning — he reviews every proposal, corrects it, and signs off, which takes three hours instead of eight and grades the fiftieth test the same as the first. Templates handle repeat student questions. The dissertation gets two whole days — days, not evenings.
Phase 1: the Monday research routine
Keeping up with the field means one boring task a week: go through what came out and decide what to read. The searching is mechanics, the reading isn't — and it's the searching you can hand off.
Setting up the routine
The best format is a scheduled task — a routine that runs itself on schedule and has the result waiting for you Monday morning. You don't have to remember to do it, and you don't have to open the databases yourself.
The routine's instructions have to be specific. “What's new in my field” gets you popular-science articles from the media. You want scholarly work on a clearly defined question.
Every Monday at 7:00, prepare a review of what's new in my field.

My topic: [precise definition, 2 sentences]
Key terms in [my language]: [term 1], [term 2]
Key terms in English: [term 1], [term 2]
I'm interested in: peer-reviewed articles, preprints, conference
papers, and research reports from the last [14] days.
Not interested in: news articles, blog posts, marketing copy.

Output:
1. A list of findings — for each: author, year, title, where it was
   published, link
2. Two sentences per item: what it finds and why it's relevant to my topic
3. Sort them into: READ IN FULL / ABSTRACT IS ENOUGH / JUST LOG IT
4. Separately flag any work that contradicts my existing conclusions
5. At the end, 3 search queries in English I should use to keep digging

Cite a source for every claim. If you're not sure a paper exists,
say so instead of filling it in with a guess.
You'll get back a structured overview you can go through in ten minutes instead of two hours. The last paragraph of the prompt is essential, and don't fully trust it either: every source you log, you have to open yourself. Models generate plausible-looking papers that don't exist, complete with real authors and a believable DOI. If it's not in a database, it doesn't exist. Point 4 deserves attention on its own — the papers that contradict you are exactly why you're doing the review.
Deep research on a new subtopic
When you're opening a new chapter, or your advisor asks about an area you don't know, reach for a one-off deep research run — a mode that searches the web itself and returns a report with links. Ask it the same things as in the routine, plus two more: where authors disagree (both sides of any dispute) and what, according to the available work, remains unanswered. That second answer is the most valuable thing for a PhD student, because a gap in the knowledge is exactly where a dissertation fits.
The same warning applies, though: treat the output as a list of leads, not as a review. Before you write anything down, look it up through your university's access to the field's databases — your school library usually gets you where the open web can't. The tip fact-checking with AI covers verification in full.
A tracking sheet from day one
Keep one table: author, year, title, where the file is stored, which part of the dissertation it relates to, status (“read / skimmed / not opened”), and one sentence on why you filed it. Without it, two years from now you'll be hunting through PDFs for the one definition you remember reading somewhere.
Phase 2: processing papers — a library that answers
A PhD student doesn't read ten papers, they read two hundred. The difference between someone who knows their way around them and someone who doesn't isn't memory — it's whether they built a library they can ask questions of.
Why a tool built for your own sources, specifically
NotebookLM only answers from what you upload into it, and cites the exact source for every answer. That's a crucial difference from an ordinary chat for scholarly work: it doesn't mix your literature up with whatever it has memorized, and when the uploaded papers don't have an answer, it says so. Full instructions are in the tip NotebookLM over your own sources.
Practical organization: one notebook per topic, not one for the whole dissertation. A notebook with twenty carefully chosen papers answers better than one with a hundred and fifty thrown in “just in case.”
Extracting methodologies into a table
The most useful thing you get out of a paper library isn't a summary. It's a comparative methods table: who measured what, on how large a sample, with what method, and what result. By hand it's a week of work, and it's exactly the table you'll need for your methods chapter and for your own article.
Go through all the uploaded studies and build a comparative
methodology table.

Columns:
author and year | research question | study design | sample (who, N) |
data collection method | measured variables and how they were
operationalized | statistical method | main result | stated limitations

Rules:
- fill it in strictly from the uploaded sources
- where a study doesn't state something, write NOT STATED, don't guess
- for each row, give the page the data comes from
- don't merge studies with different designs into a single row

Under the table, write:
1. Which methods recur across the field and which are one-offs
2. Where studies diverge in how they operationalize the same concept
3. Which combinations of sample and method nobody has used
You'll get back a table you can carry straight into your article and your dissertation. Point 3 below the table is the seed of your own study — a gap in the methods is the most defensible reason for doing what you're doing. Check sample sizes and test statistics especially closely: numbers are where both OCR and the model get things wrong most, especially with scanned older papers.
Differences and disputes between authors
Based on the uploaded sources, answer this question: [question].

Structure it like this:
1. Where authors agree — for each point of agreement, cite the studies
2. Where they directly disagree — for each dispute, both positions,
   who holds them, and what data backs each one up
3. Whether the disagreement is explainable by a difference in method,
   sample, or the period the data was collected in
4. Which studies are original research and which just cite someone
   else's findings
5. A timeline: how the view on this question has evolved

Don't add anything that isn't in the uploaded sources. Where the
sources don't answer the question, say so.
Point 4 saves embarrassment: every field has a handful of claims everyone cites secondhand, while the original study actually says something else. Point 3 is material for the discussion section of your own article — explaining someone else's disagreement methodologically is stronger than just noting it exists.
Your own reading notes on a paper
You can't delegate the reading, but you can speed up the note-taking. Have a reading brief prepared for a paper: the main thesis in five sentences, design and sample, five findings with page numbers, three exact quotable passages — and above all a “watch out for” point (where conclusions outrun the data, where there's no control group, where the sample is narrow). That last point is what turns this into a reading aid instead of a substitute for reading. Add to the instructions that the model should rely strictly on this source, and where a page number can't be found, say so instead of guessing.
One technical note about scans: with old or crookedly scanned PDFs, OCR gets numbers and diacritics wrong, and mixes up paragraphs in two-column layouts. Before you take a number or a direct quote from a source like that, open the original page and compare.
Phase 3: prepping teaching from your own material
An exercise session prepared from your own slides and papers is something completely different from one generated out of thin air. The difference is that it follows on from the lecture, uses your own notation, and targets your own exam. The key phrase is therefore from your own material — upload your slides, course notes, past assignments, and the two papers the session is built on.
A ninety-minute session
Prepare material for a 90-minute exercise session. I'm attaching my
lecture slides, course notes, and two papers this session is built on.

Course: [name], year: [2nd-year undergraduate], number of students: [25]
Session topic: [topic]
What they already know from the lecture: [list]
What I want them to be able to do: [independently calculate / tell
apart / propose ...]

Give me:
1. A time plan for the session in blocks (minutes, activity, format)
2. Five problems from easiest to hardest — for each: the problem
   statement, a complete worked solution, and an estimated time
3. For each problem, the most common student mistake and how to
   explain it on the spot
4. Two warm-up questions to open the session
5. What to assign as homework and how long I'll spend grading it

Base it on my own material and stick to the notation I use in it.
Where you'd need something that isn't in the material, write
MISSING: [what].
You'll get back a session you just need to review and tweak. Do the math on the worked solutions yourself — especially in quantitative fields, the model computes “by eye” and the result looks plausible without being right. For problems involving calculation, it's safer to have it write a script that computes the numbers instead. Point 3 is the part you'd otherwise only pick up after three years of teaching.
An explanation that actually lands with students
When students keep failing to understand something, it's usually not their fault, it's the explanation's fault. Have several versions built and pick the one that fits your group.
Students keep failing to understand [concept/procedure]. The
explanation I currently use is: [paste your explanation].

Give me 4 different ways to explain it:
1. Through a concrete example from the field
2. Through an everyday analogy — and note where the analogy stops
   holding, so I don't push it past that point
3. By deriving it from fundamentals they already know from [course]
4. Through a typical mistake: show what goes wrong when it's
   understood backwards

For each version, note who it fits (who thinks visually, who thinks
in calculations) and one check-in question I can use in class to
confirm they got it.
Point 2, about where the analogy stops holding, matters: an analogy students push further than it actually applies produces a misconception you'll spend half a semester unwinding.
Materials for the session
From a finished session plan, have two deliverables generated in one request: a one-page handout (problem statements without solutions, the formulas needed, space for notes, two extra take-home problems) and an outline of eight to ten slides with headlines phrased as claims. Add to the instructions that the model should keep your notation and not add anything beyond the session plan — without that it happily tacks on “bonus” material you never covered, which just confuses students. You can have a clickable preview built as an artifact and use it to tune what fits in the time available; then lay out the slides using the process from the tip from a document to a presentation.
Phase 4: grading tests — AI proposes, you sign off
This is both the biggest time saving and the hardest line in the whole guide.
The ironclad rule
The instructor assigns the grade, not the model. A grade is a decision with consequences for a real person — it affects funding, progress through the program, self-confidence. AI is allowed to be a fast first reader that proposes a score and a reason for it, but you review and sign off on every single proposal. In practice that means: the model returns a proposed score with reasoning, you read it, and for disputed answers you open the original and decide. What's left is roughly a third of the original time, not zero.
The flip side of the same rule: grading has to be defensible without referring to the tool. When a student comes to you saying they're missing a point, you're the one answering, with the answer key in hand. “That's how the AI scored it” isn't an answer you can give out loud.
Anonymize before you upload anything
Tests contain names, student numbers, sometimes even national ID numbers on the header. Before you upload any files anywhere:
- black out or cut off the header with the name — for a scan, cropping is enough; for photos, cover the name before you even take the picture
- assign every test a sequence number and keep the key (number = name) in a file on your own machine that never gets uploaded anywhere
- use an institutional or paid account with contractual data protection, not a free chat
- check your university's rules — some faculties have explicit policies on uploading student work to external services
A phone can scan a whole set — use a document-scanning mode that corrects the perspective.
The answer key as the first step
The quality of the proposals lives and dies with the key. A vague key (“correct approach: 3 points”) produces vague scoring. Write the key before you start grading — and have it checked.
Here's the test and my answer key:

[paste the test and the key]

Go through the key like an experienced instructor and write:
1. Where the key is ambiguous — i.e., where two graders would give
   different scores for the same answer
2. Which partially correct approaches the key doesn't address at all
3. What alternative correct solution a student might write that the
   key would reject
4. A proposed addition of partial-credit points so the key can be
   applied mechanically

Don't change the point values for the problems. Return the amended
key as bullet points.
You'll get back a key sturdy enough to survive fifty tests without changing along the way. Point 3 is the reason this prompt pays off: an alternative correct solution you hadn't thought of is usually the most common source of grade disputes.
Proposed scoring, including handwriting
Models can read scanned tests, including handwritten ones — reading images and handwriting is a standard capability. But they get it wrong on illegible handwriting, which is why you need to build an admission of uncertainty into the prompt.
Attached is a scanned test (student number [07]), the assignment,
and the answer key.

Follow these steps, don't skip any:
1. Transcribe verbatim what the student wrote for each problem. Where
   the handwriting is illegible, write ILLEGIBLE and don't quote a guess.
2. For each problem, compare the answer against the key and propose a score.
3. For each proposal, write one sentence of reasoning referencing the
   specific point in the key.
4. Separately flag NEEDS REVIEW for answers that are partially
   correct, unusually phrased, illegible, or correct via a different
   approach than the key describes.
5. At the end, a point total and a list of everything I need to open
   and check myself.

Don't grade handwriting or spelling unless the key requires it.
Don't assign a grade, just points.
You'll get back a proposal to review. The process: read the reasoning on every problem, open the original for anything flagged NEEDS REVIEW, and spot-check two or three complete tests as well — it's the only way to catch the model systematically underscoring some type of answer. Point 1, the verbatim transcription, is there deliberately: without it, the model just grades directly and you have no way to know whether it even read the text correctly.
Consistency across the set
Grader fatigue is a real problem: the fiftieth test at two in the morning gets different points than the first. A mechanically applied key removes that variance — but only if you check it across the set afterward.
Here are the proposed scores for the entire set of tests (students
numbers [01]–[48]) with reasoning.

Check internal consistency:
1. Find pairs of answers that are the same in substance but got
   different point counts — for each, give both student numbers
2. Flag any problem where the spread of points looks suspiciously
   narrow or wide
3. List any problem that more than half the students failed, and
   note whether the issue is with the question or with the material
4. Build a table: student | points per problem | total

Don't change anything, just list the findings.
Point 3 is feedback on your teaching, not on the students: a problem half the group failed usually means something didn't get explained well in the session.
Feedback for students
Points are the minimum; what actually helps students learn is a sentence about where they went wrong. That can be prepared in bulk and signed off on personally.
For each graded test, write the student short feedback following
this pattern:

- one sentence on what worked (specific, not “good job”)
- for each lost point: what specifically was missing and what it
  should have looked like
- one recommendation for what to review before the exam, with a
  reference to the relevant chapter in the course notes

Tone: matter-of-fact, kind, no irony, no judging the person —
we're evaluating the solution, not the student. Max 120 words.
Address students by number, don't use names.

[paste graded tests with points]
You'll get back drafts you review and send out under your own name. Watch for feedback that states something not actually in the test, and make sure the tone fits your group — the model tends toward mild sentimentality that undergrads pick up on immediately.
Phase 5: emails and admin
PhD admin is ninety percent repetition. Fifty students ask about the same five things, activity reports differ only in the numbers, reports to your advisor keep the same structure.
Templates from your own sent mail
The best templates don't come out of nothing — they come from replies you've already written yourself. The process is in the tip templates from sent mail.
Attached are 15 of my sent replies to students from last semester.

Turn them into templates:
1. Sort them into types by the reason for the question (deadline,
   credit transfer, assignment instructions, absence excuse,
   consultation, technical submission problem)
2. For each type, build a template with square brackets for what
   changes ([name], [deadline], [assignment title])
3. Keep my tone and how I address people — don't make it more
   formal, and don't add phrases that aren't in my actual emails
4. For each template, note when NOT to use it and to answer
   personally instead

Keep the templates short. Where my original replies were rambling,
tighten them up but keep the information.
Point 4 is the safeguard people forget: a student writing that they can't submit because they're in the hospital doesn't deserve a template. Use templates for routine questions; answer everything else yourself.
Recurring admin as a routine
A monthly report to your advisor, a quarterly activity report, a summary of hours taught — all of it can be prepped by a routine that has a draft ready for you on the right day, built from your own notes and calendar.
Every last Friday of the month, prepare a draft report for my advisor.

Base it on: my notes in the folder [path], calendar entries for
that month, and the list of sources I've read.

Report structure:
1. What I did over the month (3 to 5 bullets, specific)
2. Where I got stuck and what I need a decision on
3. What I'm planning for next month
4. Questions for my advisor — ones where their answer changes what I do
5. Status of publications and deadlines

Keep it brief, one page max. Don't make anything up — where the
material doesn't say what I did, write FILL IN.
Always read the draft and fill in the gaps — the model doesn't know about anything you never wrote down. And the rule stands: AI proposes, the person sends.
Phase 6: a dissertation is a bachelor's thesis, scaled up
Your own research doesn't differ methodologically from a final thesis, it's just longer, deeper, and has to bring something new. The whole honest workflow — from research question through literature review and script-based data analysis to a simulated opponent — is laid out in the tip a bachelor's thesis with AI. Here's just what's different for a PhD.
Scripts do the analysis, not the chat — a language model doesn't generate a calculation, it generates text that looks like a result. The text lives in one file, not fourteen; for a document written over three years, versioning is a survival question, so use markdown and Git, or at minimum dated daily copies. And check every citation against the original, every single one — a dissertation has several hundred of them, and one invented entry casts doubt on the rest of the list.
There's also one thing a final thesis doesn't have: publications. A journal article can be pulled out of a drafted chapter, and vice versa. Peer review is then its own discipline, where AI is useful for exactly one thing — preparing material for a response to reviewers that you then rewrite in your own words.
I got reviews from two reviewers on my article [title].
I'm attaching the reviews and the manuscript.

Prepare material for my response:
1. Break out every comment separately, even if several are in one
   paragraph
2. Sort them into: agree and will fix / partially agree / disagree
   and need to defend / misunderstanding, just needs explaining
3. For each one, write exactly what I'll change in the text and on
   which page
4. For points where I disagree, propose a substantive argument backed
   by the data in the article — no defensive tone
5. List comments that contradict each other between the two reviewers

Don't write anything in final form for me, this is my working material.
Point 5 is practical: contradictory reviewer requests get handled by politely flagging them to the editor in your response, not by trying to satisfy both. And write the response in your own words — it's part of the scholarly communication that's yours to conduct.
Phase 7: rules, disclosure, and limits
The last phase is the boring one, and the most important. Universities and journals both have rules for using AI in research and teaching — and they're being written right now, so what applied last year might not apply this year.
Find out your faculty's rules before you deploy anything. Three things typically differ: what you're allowed to use for your own research, what for teaching and grading, and how it gets disclosed. For journals, look up the author guidelines — most publishers now require you to state what you used a tool for, while also banning listing a model as a co-author. And disclose specifically: “AI was used in the writing process” says nothing; a useful disclosure states exactly what for, which tool, and what you checked yourself.
Lines you don't cross. No student personal data into a free chat. No other people's manuscripts from peer review, no unpublished data from colleagues, no material under embargo either. You sign the grade and the review.
Attached is the exact wording of our university's policy on AI use
in study and teaching, and the author guidelines for the journal [name].

Go through them and give me:
1. What's explicitly allowed under them
2. What's explicitly forbidden
3. What isn't mentioned and is therefore ambiguous — for each, note
   who to ask
4. The exact disclosure wording I should use, given that I used AI
   for: [source review / language editing / proposed test scoring /
   none of the above]
5. What I should record about using the tool in case anyone asks later

Quote directly from the attached text, don't paraphrase from general
knowledge.
The last line matters: paraphrasing from memory is exactly where the sentence about mandatory disclosure gets lost. Paste the policy in verbatim and have it show you exactly where each answer comes from.
Common mistakes
- Letting AI assign the grade. Grading is your responsibility and your defense when a student disputes it. A proposed score is a tool; the signature is a human.
- Uploading unanonymized tests to a free chat. Student names and results are personal data — sequence numbers, an institutional account with contractual data protection, and faculty rules, or don't do it at all.
- Trusting citations from a literature review without checking them. Models produce plausible papers that don't exist. Anything you haven't opened in a database doesn't belong in your log or your article.
- Having statistics computed in the chat. A model doesn't generate a calculation, it generates text that looks like a result. Numbers for your dissertation and for exercise problems alike need to come from a script you can rerun.
- Generating teaching material out of thin air. A session that wasn't built from your own slides and notes doesn't follow on from the lecture, and students notice within five minutes.
- Uploading other people's unpublished manuscripts. Peer review is confidential; a colleague's manuscript isn't your material, whatever you want to do with it. The same goes for faculty and journal rules: read them before you deploy a tool — retrofitting a disclosure is much harder.
The best tools
- Claude with scheduled tasks — the Monday research routine, a monthly report to your advisor, draft replies to students; runs on schedule, you just read and approve.
- NotebookLM — a library of papers on your topic: answers only from the sources you upload and shows where each answer came from.
- Claude Cowork — working over a folder of scanned tests and teaching material: proposed scores against your key, a results table, session materials, without copying everything into the chat.
- Projects with persistent context — one project per course you teach, with your notation, your key, and your conventions; you don't have to spell them out every time.
- Python scripts (pandas, matplotlib) — analysis for your dissertation and for exercise problems alike: exact, reproducible, defensible.
- Zotero — a source log from the first paper you read; AI can help format a citation, you verify that the source exists.
What you get out of it
- Time: conservatively, two days a week — mostly from the research routine (two hours down to ten minutes) and grading (eight hours down to three). That's the difference between a four-year PhD and a six-year one.
- Money: indirectly — an extra year of study costs a year of salary you'd have earned elsewhere, and a paper submitted on time is often a condition of a grant.
- Consistent grading: an answer key applied the same way to the first test and the fiftieth. You're policing fairness and edge cases, not your own attention at eleven at night.
- Better teaching: prep no longer eats an afternoon, so you walk into a session with five good problems and prepared explanations instead of two thrown together at the last minute.
- Peace of mind: routines mean you don't have to remember Monday, and the report to your advisor doesn't get written the night before the meeting.
- Quality: comparative method tables and a map of disputes in the literature show you the gap your work fits into — before your third year, not during it.
Pro tip
Build one simple check into grading that costs ten minutes and protects you from a systematic error: before you close out a set, pull three tests at random and grade them entirely yourself, without looking at the proposal. Then compare. If the proposal is off on one of the three, the problem is in the key, not the students — and you catch it before you send out fifty grades. Do this check on every new set, not once a semester.
And finally, the part that matters most. The remaining ten percent of a PhD student's job that AI can't handle is also the most important: your own research question, the responsibility for a grade — and beer with students after a lecture. Leave that third one to humanity a little while longer; there we still hold a comfortable lead. More seriously: mentoring and the relationship with your students are what they'll remember you for, and they're also the one part of this job nobody's going to speed up. AI frees up time for it — don't let it replace it.
Want to go deeper? The handbook has a whole chapter on it — AI and automation.
Similar tips
Quick Note: Fn+Q opens a sticky note anywhere in the system
Fn+Q
An idea or a phone call in the middle of work? Fn+Q brings up a floating note over whatever you're doing — and it saves itself to Notes.
Safari Reader: an article without the ads and clutter
Cmd+Shift+R
Reader view strips an article down to nothing but text and images. Read without blinking banners — with your own font size.
Screen recording without installing anything
Cmd+Shift+5
Cmd+Shift+5 opens a panel that handles both screenshots and screen video — including area selection and a timer.
Common questions
Can AI grade the tests?
No — the instructor assigns the grade. AI may be a fast first reader that suggests points per your rubric and justifies them, but you review and sign off on every suggestion. The grading must be defensible without reference to the tool: “that's how the AI scored it” is not an answer you can say to a student.
What must I do before uploading student tests?
Anonymize: cover the header with the name, assign each test a sequence number, and keep the name–number key to yourself. Use an institutional or paid account with contractual data protection, not a free chat, and check your university's rules — some faculties explicitly regulate uploading student work to external services.
Can I trust the papers the research routine finds?
Only after verification — models generate plausible-looking nonexistent papers with real authors and believable DOIs. Every source you record must be opened in a database, ideally via your university's access. What you can't find doesn't exist.
Why use NotebookLM instead of a regular chat for the literature?
Because it answers only from what you upload and shows a citation into a specific source for every answer — it doesn't mix your literature with what it holds in memory, and when the answer isn't in the uploaded papers, it says so. Practically: one notebook per topic, not per dissertation.
How do I keep grading consistent across the whole set?
First have your rubric reviewed (where it's ambiguous, what alternative correct solutions it misses), then run a consistency check across the set: identical answers with different points, suspicious spread. And the extra check: grade three tests fully yourself without looking at the suggestions and compare — if one in three differs, the problem is the rubric.
Do I have to disclose AI use somewhere?
Yes — universities and journals have rules that are being written right now and change every year. Find your faculty's policy and the journal's author guidelines before deploying the tool, and disclose specifically: for what exactly, which tool, and what you verified yourself. “AI was used in writing” says nothing.
Was this helpful?
Liked this tip?
I send one like it every week by email. Two minutes to read, hours saved.
The Top 30 tips e-book, free — it lands in your inbox right away.
Then 1 tip a week · no spam · unsubscribe in one click
Prefer a system to single tips? The free email course — seven days, seven emails, one skill a day.